Deploying VDI for RDS 2012 / 2012 R2
Applies to: Windows Server 2012 and 2012 R2
In previous articles, we looked at the deployment steps of a traditional form of Remote Desktop Services (RDS) for 2012 and 2012 R2. Now let’s take a look at the setup of VDI for a 2012 RDS farm. This will be broken down into three parts. In this first part, we will go through the process of deploying the RD Virtualization Host role to a single Hyper-V server in an existing 2012 RDS farm. Then in the second part, we will go through the process of creating a desktop collection and publishing a Windows 7 pooled VDI desktop. Finally in part three, we will go through the process of maintaining a desktop image for a pooled desktop. This portion will cover the maintenance and updating of the main image in a pooled VDI desktop environment.
Part I
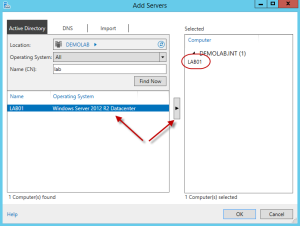
Before we begin, we will first need a physical 2012 server with the Hyper-V role installed. In a production environment, a Hyper-V cluster is preferred, however for this example, we will be using a single Hyper-V server for our deployment. This is a single physical domain joined 2012 R2 server running Hyper-V called Lab01. The server must be physical and not a virtual machine. We will add this new RD virtualization host (RDVH) server to our existing RD farm.
To begin, open Server Manager and add the designated RDVH server to be managed.
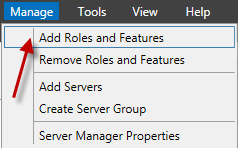
Once added, go to Manage and select Add Roles and Features.
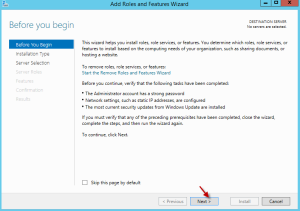
On the Before you Begin Screen, hit next.
On the select installation type screen, select Remote Desktop Services installation and hit next.
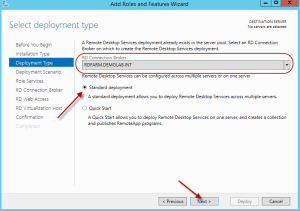
Since we are adding the Virtualization Host to an existing RDS farm which is already being managed with Server Manager in the server pool, it will automatically find the RD connection broker as it will be listed in the drop down. Select standard type and hit next.
For the deployment scenario, select virtual machine-based desktop deployment and hit next.
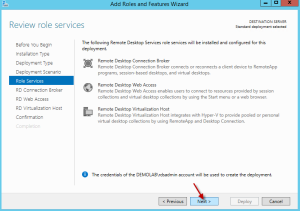
On the review role services page, hit next.
Since our farm is already configured, on the “Select RD Connection Broker server” and the “Select RD Web Access server” screens, the information is automatically added for you. Click next on both screens.
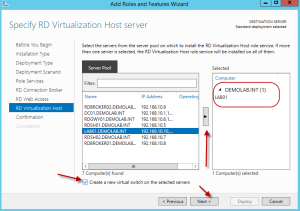
On the Specify RD Virtualization Host Server screen, let’s add our designated Hyper-V server. In this scenario, we are also going to allow the wizard to create a new virtual switch within Hyper-V to be used for our virtual desktops. This step is not required if a virtual switch was already configured on the Hyper-V server. To do so, check the box which says “Create a new virtual switch on the selected servers” and hit next.
On the confirmation screen, review the settings, then check the box “Restart the destination server automatically if required”. Hit Deploy.
Once it is finished, hit Close to close out of the wizard. If you now look in Hyper-V Manager, you will see a new virtual switch was created and will be used for the virtual desktops.

Now that we have our RD Virtualization Host server deployed, let’s go back into RDMS within Server Manager and edit the deployment properties of our farm.
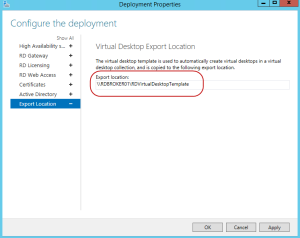
Within the deployment properties, we now have two new sections. One is called Active Directory and the other Export Location.
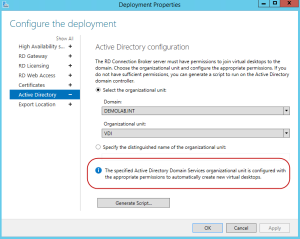
Within the Active Directory section, this is where we can specify the default Active Directory Organizational Unit which will house our VDI desktops. In order for this to work, the RD Connection Brokers will require full control on the security of the OU. Ive already pre-created an OU called VDI, and when I select it, it will give me an error stating the permissions are not correct.
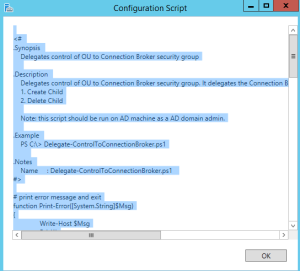
Depending on the level of security with the account you are logged in as, you can hit apply for the correct security permissions to be applied to the OU. In some cases, you may be using an account which does not have access to make this change. In these cases, you can click on Generate Script and it will generate a PowerShell script you can copy and send to an admin who has the correct administrative privileges who can run the script to apply to appropriate permissions.
When the correct permissions are made, you will see the following message stating it is configured with the appropriate permissions.
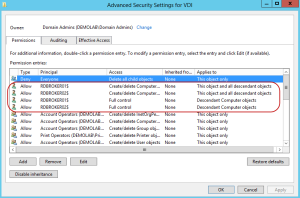
If we look at the security settings for the OU, you can see the correct permissions have been made. It will apply these permissions for each of the RD Connection Brokers in the farm since these will be the servers which will be facilitating the creation and deletion of the virtual desktops.
Finally, let’s look at the Export Location section. Here we can specify the folder where the virtual template, which is used to create the desktops, will be copied to. The default location will be shared on the active RD Connection Broker to a folder called RDVirtualDesktopTemplate. If you already have a folder designated for the virtual template, you can change it here and apply the changes.
Now with our RD Virtualization Host deployed, we are ready to move on and create a new collection to publish our VDI desktops.







No comments:
Post a Comment